For starters, they cause your dryer to work harder to move air, so the dryer has to run longer in order to dry the clothes. This leads to higher energy costs.
Plus, they are a big fire hazard. Almost 3,000 house fires occur each year in the US due to clothes dryers. About 34% of those are a result of not cleaning the dryer vents.
For a safer, more efficient home, you need to clean your dryer vents regularly.
Luckily, it’s pretty easy to clean a dryer vent. Almost everyone can handle this simple project.
Just follow the simple steps listed below and you can rest assured, knowing your family is safer and your dryer can operate efficiently.
1. Find Your Duct and Exterior Vent
To start your dryer duct cleaning, gather your supplies. You’ll want a vacuum cleaner with a hose and lengthening attachments.
You’ll also need a screwdriver to remove the vent covers and hose connections. A pair of safety gloves will come in handy to keep your hands clean and protected from scratches.
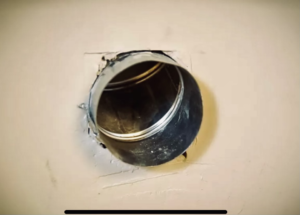 You will also need to know where everything is. First, head to your dryer and locate the metal duct connected to the rear. Make note of where this duct leads to, usually through the wall or ceiling.
Then, head outside and locate where the dryer vent discharges. Most discharge through a sidewall, but some discharge through the roof.
If yours discharges through the roof, and you feel comfortable climbing a ladder and getting onto the roof, then you’ll need to go up there for part of the cleaning process.
If you don’t feel comfortable on the roof, then you’ll just have to do the best that you can from inside your home where the vent goes into the wall
Anyway, for this step, you just need to locate where your dryer vent discharges, normally through a sidewall or the roof. This is where the hot, moist, fresh-smelling air comes out when you run your dryer.
2. Disconnect the Duct and Prepare for Cleaning
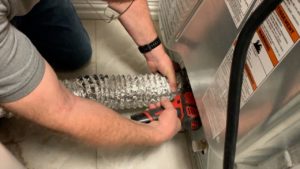 To do this, you’ll want to safely unplug your dryer. Make sure to turn the gas off first if you have a gas dryer.
Pull the dryer away from the wall and then you can remove the dryer duct hose from the rear of the dryer either by pulling or twisting the duct or by unscrewing the clamps.
Then, head outside and remove the exhaust vent cover.
3. Clean the Inside of the Duct
Normally, there is a flexible transition hose connecting the back of the dryer to the wall. The duct in the wall should be made of rigid metal. (More on this later.)
 If you can detach the transition hose from the wall behind your dryer, carry it outside for cleaning. This gives you more space and will make less of a mess in your laundry room.
If there is visible lint buildup in the hose, pull out as much as you can with your hand.
Then, using a vacuum with a suction hose and lengthening attachment, suck up as much lint as possible from inside the transition hose.
Use the vacuum inside both of the wall ducts as well (from inside and outside the house).
4. Use a Duct Brush
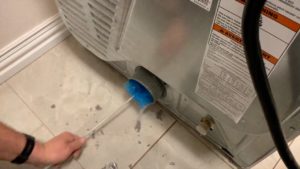
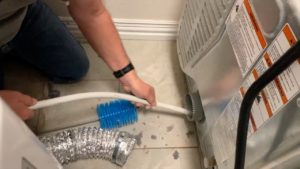
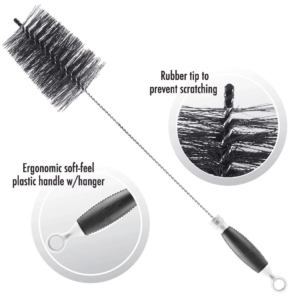 Dryer duct brushes make it easy to finish removing lint from the corners and crevices inside the hose and duct. You can find these for a few dollars at your local hardware store.
The damp lint blowing through the duct and vent is almost like a paste – it sticks to the inside of these hoses and ducts, and once it dries it can be difficult to remove.
The cleaner you can get your dryer vents and hoses, the cleaner they will stay, because once it begins to build up on the vent pipe walls, new lint will easily stick to the lint on the walls.
Brushes for dryer vent cleaning have adjustable, flexible handles that can reach far into the vent. Extend the handle as long as you need to. Move the brush around inside the ducts and continue pulling lint out until the inside is clean.
NOTE – There are rotating brushes that you can attach to your drill. These are often very helpful in cleaning the ducts and vents and in removing the stubborn, dried-on lint from the walls of ducts and vents.
5. Vacuum the Edges
With your vacuum still handy, clean the area surrounding your exterior exhaust vent before mounting the vent cover. Remove any lint tucked around the opening and from the louvers.
On the backside of your dryer, use your hands to remove any visible lint. Then, use the vacuum to clean the area where the duct connects.
5. Clean Out Your Dryer
Just like the vent and hose, you also need to clean out any lint that has built up in the dryer.
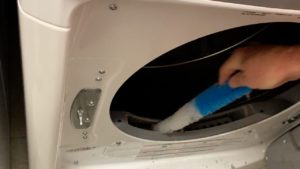
Reach into the opening in your dryer where your hose connects and pull out any lint that you can reach.
Stick the vacuum attachment into this opening and suck out as much lint as possible from inside the dryer.
Use the brush that you used for the hose and vent in this opening to clean out any remaining lint.
Remove the lint filter from the dryer and stick a dryer brush into this opening to remove any lint that has accumulated. Use this small brush to clean as deeply into the dryer as it will reach into this opening.
7. Inspect Your Hose and Vent
While you’ve got everything taken apart, it would be a great time to do a quick inspection of your dryer hose and the vent pipe.
Make sure that the hose is in good condition with no tears that could allow hot, moist air and lint to escape into your house.
Use a flashlight and look into the vent pipe both from inside the house and outside.
Besides making sure that it is clean, make sure that there are no screws or other things that could catch lint and cause it to build up more quickly.
The walls of your dryer duct should be a smooth-walked metal.
The corrugated flexible duct material should only be used between your dryer and the wall connection. It should not be used as the vent to go to the outside of the house.
8. Reconnect Your Dryer
Once you’ve removed as much lint as you possibly can and have completed 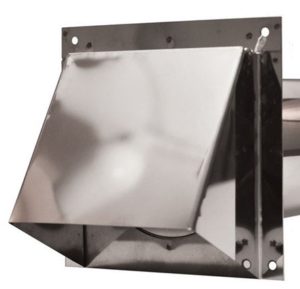 a quick inspection, it’s time to put everything back together.
Outside, attach the exhaust vent cover.
Ensure the area around the vent is clear of plants and other objects. The air needs to be able to flow freely to ensure proper dryer function.
Back in the laundry room, attach the dryer vent hose to the back of the dryer and to the wall duct. Once everything is reconnected, you can safely plug the dryer in and turn on the gas, if necessary.
9. Test It Out After Cleaning Your Dryer Vent
Before putting everything away and calling it a day, make sure to turn your dryer on to ensure it’s working. See if the dryer is filling with warm air.
Go outside and ensure the air is being properly released outside. If your dryer is working, go ahead and pat yourself on the back for a job well done.
How to Prevent Lint Buildup
Removing excess lint from your dryer hose will help protect your home from fires. Now that you’ve got a safe, clean dryer duct, the best thing to do is keep it from getting clogged. The easiest way to do this?
Make sure to remove lint from your lint trap filter before every single use, even if it’s just a little bit.
If you are drying large loads, try to remove the lint halfway through the drying process. This will also ensure your laundry dries quickly and evenly.
Make sure to sweep around your dryer weekly and wipe or vacuum surfaces and crevices.
Remember, the air that is sucked into your dryer comes from around the dryer, so if there is dust and lint on the floor, it will be drawn into the dryer and will add to the build-up of lint and debris.
If you use dryer sheets, you may get residue buildup on your lint trap filter over time. Give it a scrub and wash in the sink.
If you are installing a new transition hose, it’s important that you use a screw-free connection. Screws sticking up into the hose or duct will catch lint fast and contribute to the problem.
If you notice your hose uses screws, replace them by connecting the hose using metal tape instead. Since hot air passes through, you do not want to use duct tape.
As mentioned above, it is important that the dryer vent that runs from behind the dryer to the exterior of the home be a smooth metal.
As a home inspector, I have seen many times where the flexible, metal or plastic hose (that is normally used to connect the dryer to the wall vent connection) is used to as the vent that takes the dryer discharge to the exterior of the home.
This is not a good idea (and it is not allowed by code) because this type of hose will sag making it easy for dryer lint to accumulate in the low spots.
Also, the fact that this type of hose is not smooth will allow lint to build up quickly in this type of hose.
For this reason, only a smooth-walled, rigid pipe should be used for the dryer vent.
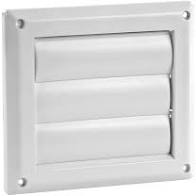
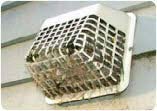
The dryer vent discharge should not be of the type that can catch a lot of lint. Never use a screen or a grid-like cover like that shown in the photo to the right.
It’s Important and Simple to Keep Your Dryer Vent Clean
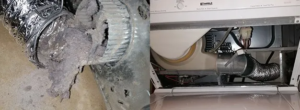
Properly cleaning a dryer vent doesn’t take much time.
Like anything else, if it’s been a while since you’ve cleaned them, then the first time will probably take a little longer, but once you get them clean, it will be much easier to keep clean.
Having a clean, mostly lint-free dryer vent will be one less thing that you have to worry about becoming a big problem in your home. It will also save you a few dollars on your utility bills.
© 2021 Mike Morgan
This article was written by Mike Morgan, the owner of Morgan Inspection Services. Morgan Inspection Services has been providing home, septic and well inspection services throughout the central Texas area since 2002. He can be reached at 325-998-4663 or at mike@morganinspectionservices.com. No article, or portion thereof, may be reproduced or copied without prior written consent of Mike Morgan.

